Stalker portal interface is one of the most favorite looks among IPTV users which is mostly seen on MAG devices. Smart STB application is a, IPTV software letting you turn any device into a stalker portal device. Before we had a tutorial on how to install Smart STB on android firestick or Smart TV, but in this tutorial we will see how it is done on apple devices.
The installation and configuration on iPhone, iPad and AppleTV is the same. In this instance we used an iPhone to make the tutorial.
Make sure your iOS is up-to-date.
In this tutorial we will cover the following:
-Installing the application and activating the 7 days free trial period of the app
-Purchasing the paid license of the Smart STB application
-Explaining settings section
-Installing the application and activating the 7 days free trial period of the app

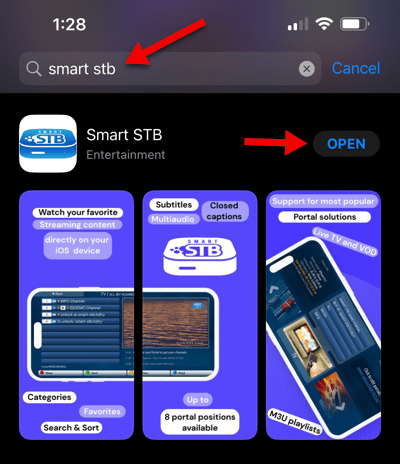
1-Open AppStore on your apple device, search for “smart stb“. Once found, click GET and then OPEN the application.
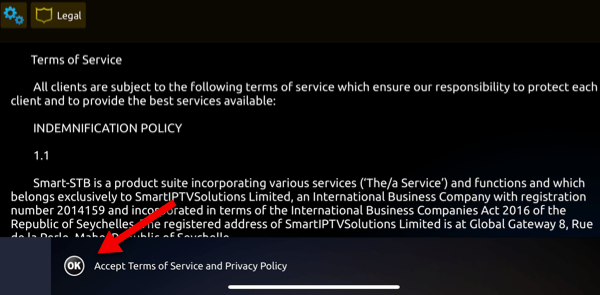
2-Accept Terms of Service. Tap on the designated section.
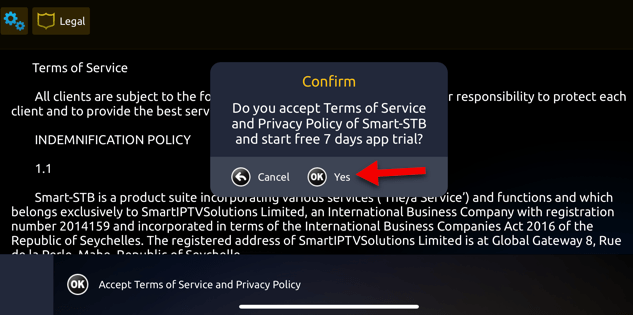
3-Following message should appear. The moment you click Yes, your 7 days free trial of the application starts.
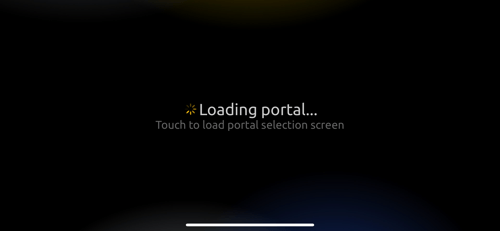
4-During the Loading Portal phase, do not touch the screen as it will take you to the portal settings section. You can do this when the application is fully setup but since we want to do the right initial steps in a straight forward way, let it load normally.
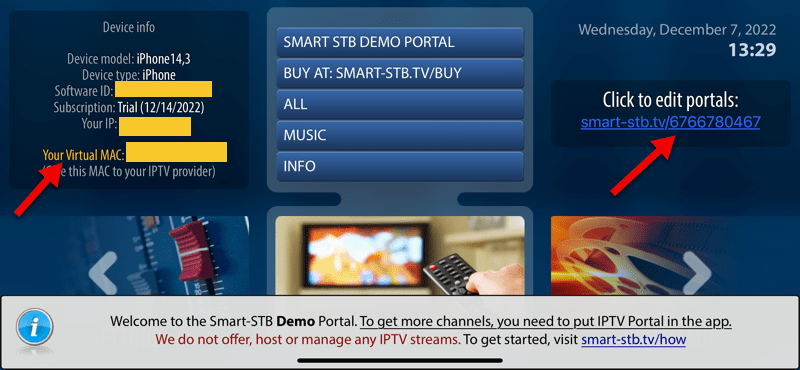
5-This is how the portal should look on first launch. Left side, you can see Device Info where device model, device type, software ID, subscription, internet IP address and Virtual MAC are shown. In the middle, there are quick links and on the right side, there is a temporary generated quick link to the Edit Portal page on smart-stb website.
First things first:
-Copy your Virtual MAC address (shown left side) which is an address in 00:1A:79:xx:xx:xx format and send it to your IPTV provider for iptv free trial or paid subscription activation.
-Then get their stalker portal address. It is going to be installed on the app and that is your source of IPTV from your provider.
-Once that’s done, click on the link on the right side where it says Click to edit portals. This will take us to smart-stb website so we remotely add the stalker portal address on the application.
Note: The link may get expired if you take too long with the process so do this when you have all the info (MAC activated at provider’s side and you have their portal address).
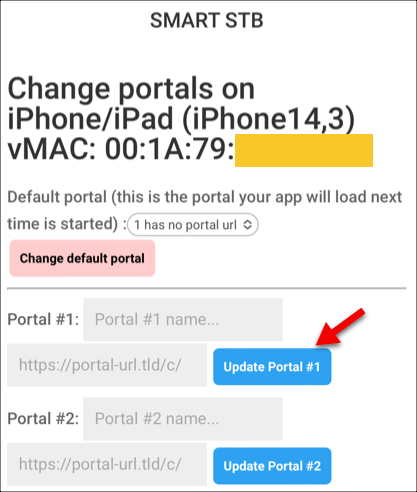
6-The link redirects you to smart-stb edit portal page and recognizes your application ID, so you just need to choose a name for your portal in Portal #1 field and then add your IPTV provider’s Stalker Portal address in the field below that. Then click Update Portal.
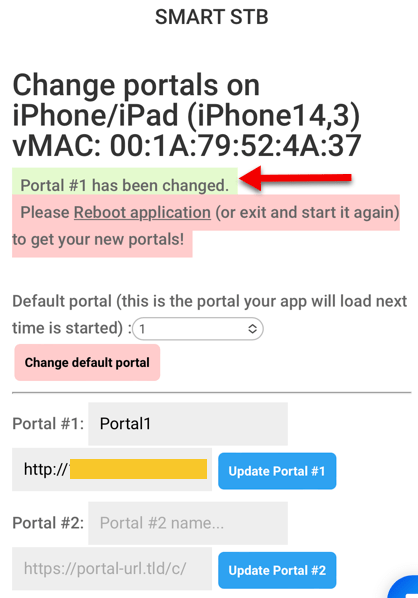
7-Our details are accepted and above you can see a message with a green background confirming that. We now need to head back to application and reboot it.
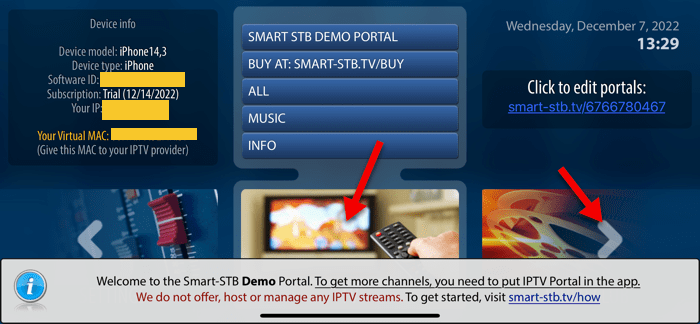
8-Let’s head back to the application. Tap on any of the designated areas so the notification at the bottom disappears, then swipe sections at the bottom and go to Settings.
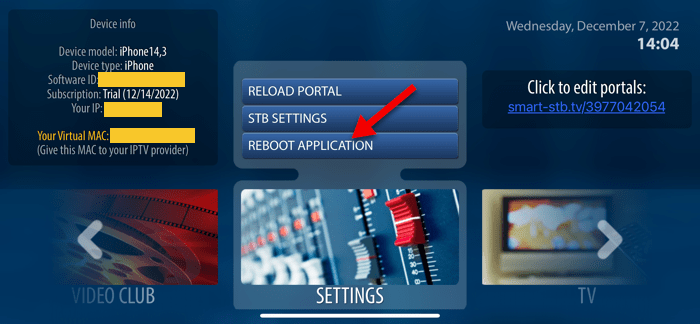
9-Click on REBOOT APPLICATION.
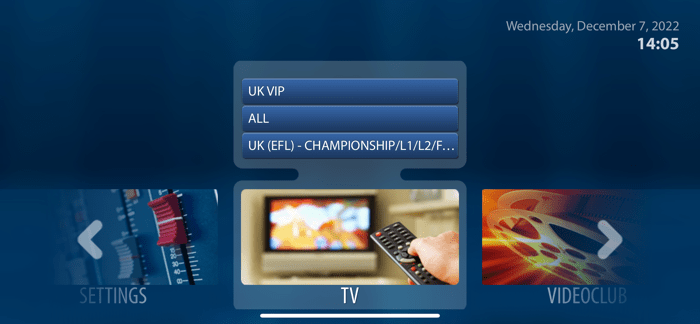
10-Once application loads up, you should see IPTV channel listing and the information from both left and right sides disappeared.
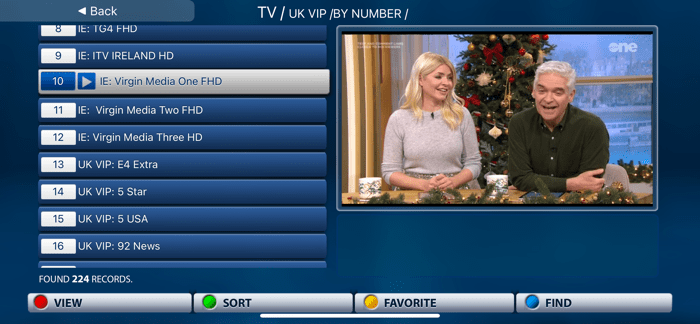
11-And channels playing fine.
So thats how you configure the application for the first time and initiate the 7 days free trial.
Try the application during the 7 days and make the best out of it. It thats what you want as an IPTV application, follow steps below to make it paid.
-Purchasing the paid license of the Smart STB application
If you come to like the app during the 7 days trial period, you can go ahead and purchase the full paid license.
There are few things I would like to ask from you:
—Compare the features list and price lists carefully and cross check them as they may seem a bit tricky. See which devices you are and will be using so pick a license which is suitable for your current and future devices. Also make sure they fit right in with the features list.
–Take your time and go through the steps as I have tried to make the steps one by one. It’s a very easy and clear procedure if you pay attention.
The paid license of smart stb comes in 2 forms:
-Lite License
-Full License
-Lite License
This license has limits, or better to say, basic features. If you are just a single user looking to run the app on a single TV and your IPTV playlist has less than 10,000 entries (LiveTV+VOD), then Lite License is right for you. Let’s have a look at the price list of the Lite License:
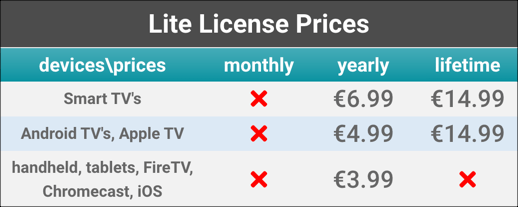
The Lite License can not be paid for in monthly plans for Smart TV, Android TV, Apple TV, any form of handheld devices (Phones or tablets), FireTV sticks or Chromcast. Basically this type of license can not be renewed monthly. It can be renewed on yearly plans. It can also be paid for as a lifetime plan except for Handhelds, FireTV or Chromcast.
-Full License
This type of license comes with all the features. So if you want to use up to 8 portals, 8 different playlist with each up to 100,000 entries in them, possibility to transfer your license between devices and … this license is right for you.
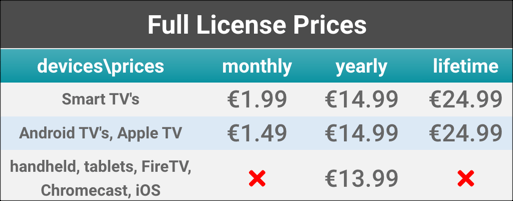
As you can see above, Handhelds, FireTV and Chromecast can not be paid for in monthly or lifetime plans. You can only pay for them in yearly periods.
Other devices have monthly, yearly and lifetime plans available to them.
Now I’m not undermining their product, hell it’s a great application, and I am in no place to tell them how to conduct their business but honestly, the pricing and licensing could have been less complicated and more user-friendly. That said, when the purchase procedure comes, it’s all straight forward meaning available plans can easily be chosen so don’t worry about making mistakes with plans. Available plans will be shown and selectable. I’m just trying to pan out all the possibilities.
Take sometime and go through the features list, it’s important:
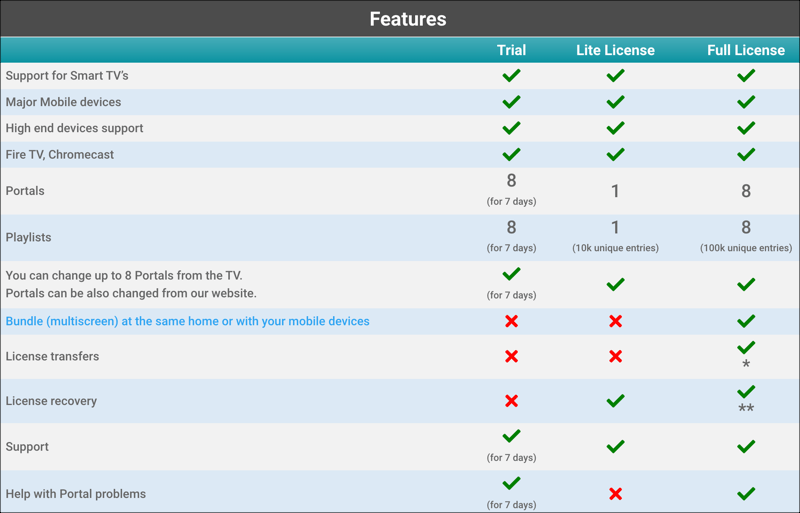
This sheds more light into choosing the right license for you. You can compare features and as mentioned before, foresee your future needs.
Let’s make an example: If you are on an apple device right now but you have plans to move the app/license to a FireTV Stick, make sure the License Transfer feature is included in your license which is going to be a Full License BUT remember Full Licenses are not doable as Lifetime on FireTV devices (see previous section).
Yeah! looks a bit tricky and they could have been easier on the license planning but I’m sure they know whats best for their product.
Let’s head to the registration and paying for the license.
NOTE: I recommend doing the purchase procedure from a 2nd device, preferably a PC, Laptop or any other device which is separate from the one you have Smart STB application installed on and want to active the license. This may help you not to get confused although doing it all on the same device is absolutely fine.

1-From top menu, click on the human icon, then click My Licenses.
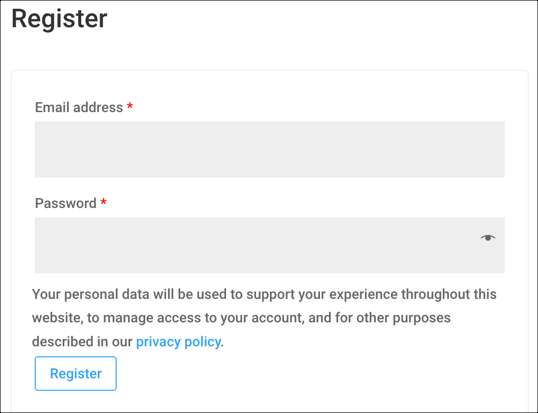
2-Right side of the page, there is a registration section. Enter your email address, choose a password and click Register.
NOTE: Enter a valid email you have access to as the system will ask you for mail verification in the next step.

3-Now, head over to your email, check inbox (and maybe spam/junk folder), find an email with subject “Your Smart STB account has been created”. Open the email.
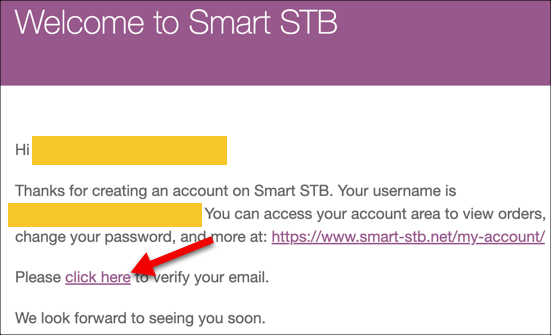
4-Click on “Click Here”.
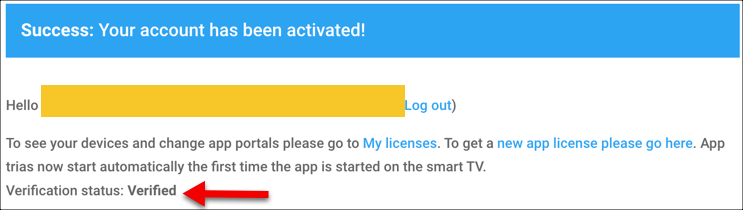
5-As you can see, the account has been Verified and activated. Now click on “new app license please go here” to start the license purchasing process.
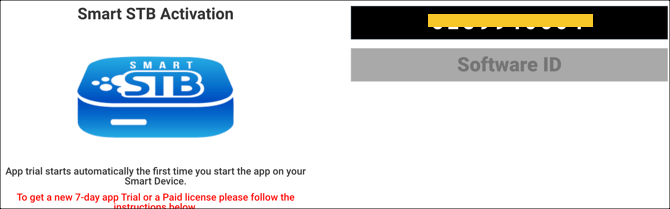
6-Once this page appears, hold it here and let’s head back to the application. We need to find our Software ID. If your application trial period has not started yet, you have just installed the application and you have not paired any playlist, it should be visible on the dashboard of the app. If not, you can find it following steps below.
7-From down side, slid to the left and click on Settings.
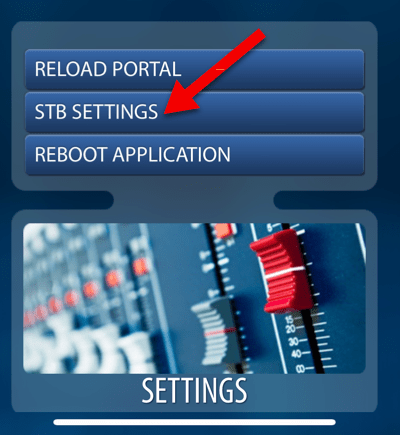
8-Click on STB Settings.
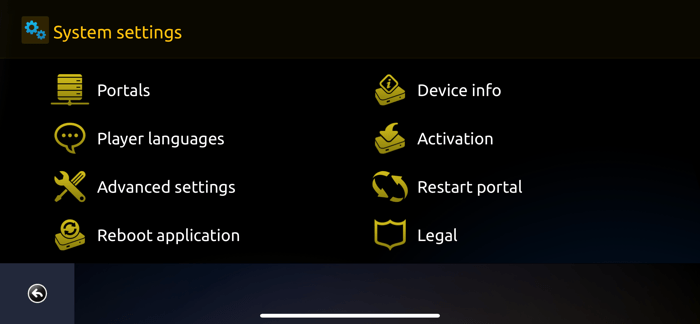
9-From System Settings, go to Devices Info.

10-There you can see your Software ID. Type it down and click the back button in bottom left corner but keep the page open on your device.
Let’s now go back to Smart STB webpage and enter the software ID we needed in earlier steps.
11-Type your Software ID in the gray area below that 10 digit number. You don’t need to enter quotation signs, it will be added automatically. Also, letters are automatically entered in caps. So you just enter the software ID without worrying about case sensitivity.
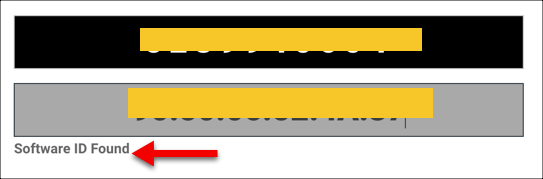
12-System confirms that the software ID input is correct and found. Keep it here and open. Lets go back to your IPTV device.
In the black area above, there is a 10 digit code, write that down to enter it in Smart STB activation section.
13-From System Settings page, select Activation.
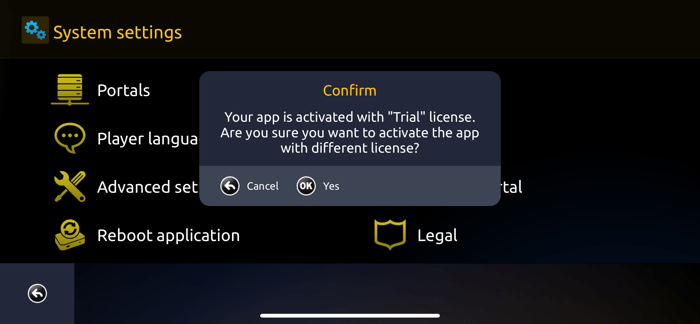
14-Tap on Yes (OK).
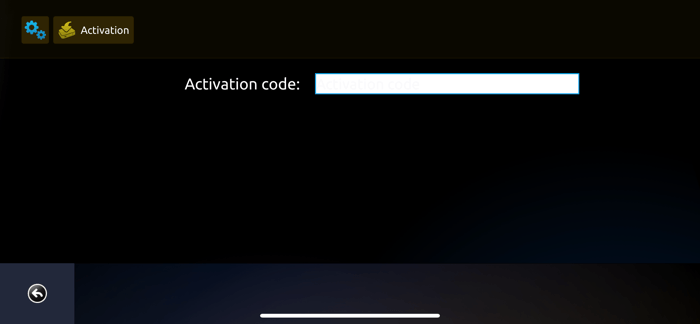
15-The 10 digit code we typed down from step 12 should be entered here.
When you enter the the 10 giti code here, on the website you will notice an immediate detection and paring. The webpage will redirect to another after 3 seconds.
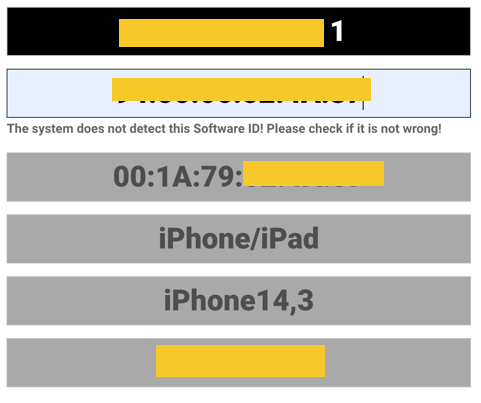
16-Above is the info appears for 3-5 seconds on website after the 10 digit code is entered on the application. Basically that webpage and the application are communicating with each other. The webpage will then redirect to another one.
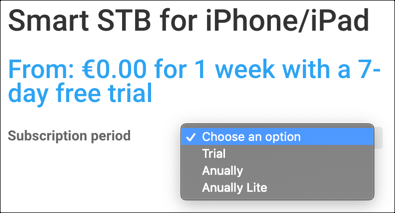
17-Top of the details on the new page you have been redirected to, you need to choose the period of the Subscription desired to pay for. Here, depending on the device detected by the system, available periods are listed. The device on this example is an iPhone 13 so available subscription periods are Annually (Full License) and Annually Lite. Different devices may have this part differently.
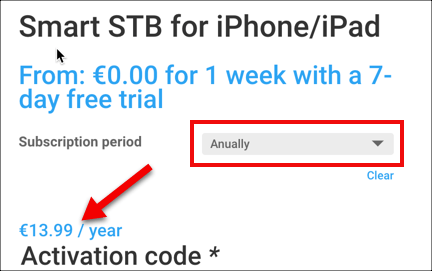
18-I have selected it as Annually which is 1yr Full License and the price shown up as 13.99 euros right below that. For you with a different choice and device could be different.
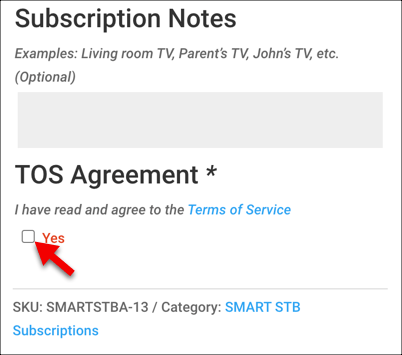
19-Scroll down and add a description if you want then check the box for TOS agreement.
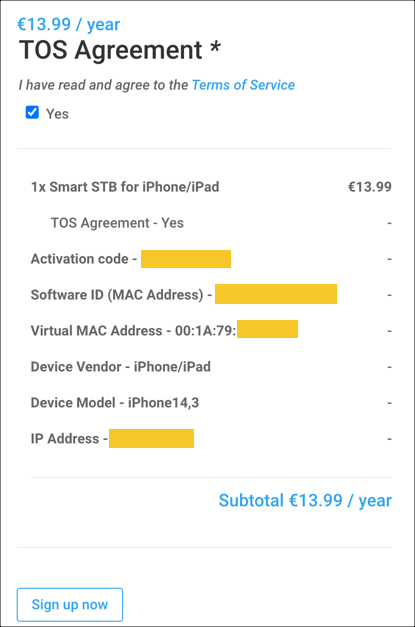
20-If all the details are correct, proceed by clicking on Sign up now.
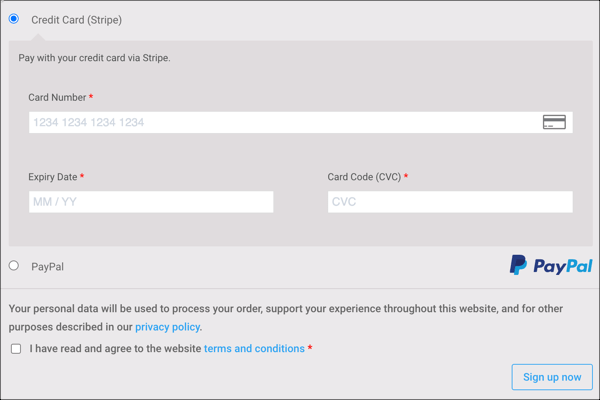
21-Next page is pretty routine, you simply enter your personal details, an additional note if you want to the Smart STB team and then scroll down and choose your payment method.
Payments are done by Credit Card or Paypal. Set everything and when ready click Sign up now.
Process the payment. Once done you will be redirected back to the portal with a confirmation that your account has been upgraded to paid.
-Explaining settings section

From the dashboard bring up Settings section and then click STB Settings.
This is how the settings page looks like, it’s nice to know whats inside each one of these sections.

Portals is where you can edit the stalker portal address of your IPTV provider. When the application loads, tapping on the loading screen should bring you here as well.
Device Info shows all the details about your device, your subscription status and your internet IP address. If you want to find out your Stalker MAC address to give it to your provider, this is the section you should come to.
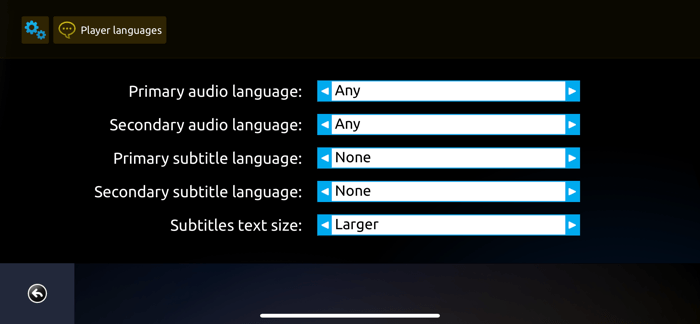
Player Languages lets you set the primary subtitle or audio track on streams. For instance, if some channels have multiple audio tracks and 2nd track is English and thats your preferred language, set the primary default audio track on 2. Leave as it is for defaults.
Clicking on Activation, following message pops up asking whether you want to change the application license. Do this when you want to change the license or upgrade from trial to paid as we did above.
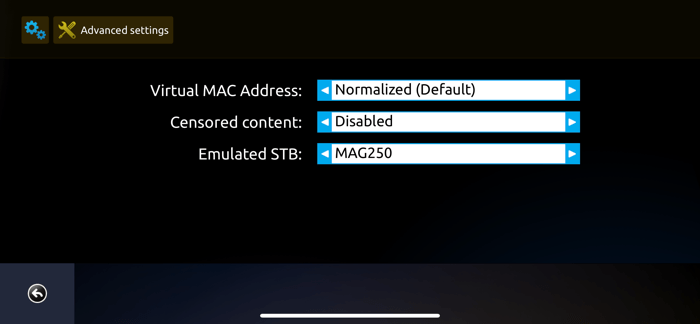
Advanced Settings most important feature would be the Emulated STB option. It changes the STB structure between MAG 250, MAG322 and MAG520. Do not change unless told by provider or Smart STB support.
Restart portal will restart the current portal and Reboot Application will reboot the whole Smart STB. Legal is just terms of service.
No comments yet